Bloody Mary Philodendron Propagation: A Step-by-Step Guide!
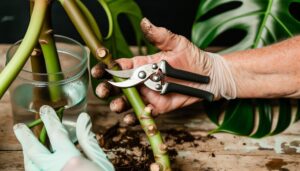
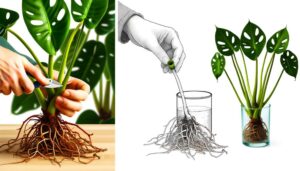
Propagating a Bloody Mary Philodendron starts with choosing a robust parent plant, free from pests and disease. Use sanitized pruning shears to take a cutting with at least one node.
Prepare the cutting by removing lower leaves and applying rooting hormone. Plant the cutting in a well-draining soil mix or water until roots develop.
Maintain ideal moisture and humidity levels to promote root growth. Monitor for new foliage as a sign of successful propagation.
For a detailed guide outlining each step and troubleshooting common issues, refer to the accompanying information.
Key Takeaways
- Choose a healthy, mature stem with nodes and intact leaves for propagation.
- Use sanitized pruning shears to make a clean cut below a node.
- Dip the cut end in rooting hormone and plant in well-draining potting mix.
- Maintain consistent soil moisture and a warm, humid environment for successful root establishment.
- Monitor for new growth indicating successful propagation and transplant into a larger pot if needed.
Selecting a Healthy Parent Plant
Choosing a healthy parent plant is crucial for successful propagation of the Bloody Mary Philodendron, as it guarantees strong genetic material and minimizes the risk of disease.
Begin by examining the parent plant for signs of vitality, such as lively foliage, sturdy stems, and absence of discoloration or abnormalities. Ensure the plant is free from pests like spider mites and aphids, which can compromise the propagation process.
Check the root system for signs of rot or disease, indicated by soft and discolored roots. A well-hydrated, nutrient-rich plant will provide ideal cutting material. Choose a parent plant that is mature but not excessively aged, as excessively mature plants may produce cuttings with reduced viability. Prioritize genetic diversity for resilient offspring.
Gathering Essential Tools
To guarantee a smooth propagation process for the Bloody Mary Philodendron, it is crucial to gather a comprehensive set of tools, including sanitized pruning shears, rooting hormone, hygienic containers, and a well-draining potting mix.
Sanitized pruning shears minimize the risk of infection, while rooting hormone accelerates root development. Hygienic containers provide a contaminant-free environment for growth, and a well-draining potting mix offers ideal aeration and moisture control.
Below is a summary of the necessary tools and their functions:
| Tool | Function |
|---|---|
| Sanitized Pruning Shears | Prevents plant infections |
| Rooting Hormone | Enhances root development |
| Hygienic Containers | Maintains a sterile growth environment |
| Well-Draining Potting Mix | Ensures proper aeration and drainage |
| Gloves | Protects hands during propagation |
Each tool plays a critical role in ensuring successful propagation.
Choosing the Right Cutting
Selecting an ideal stem for propagation involves identifying a healthy, mature segment with at least one node and several intact leaves.
Accurate node identification is vital, as nodes house the meristematic tissue necessary for root development.
Make sure that cutting tools are sterilized to prevent pathogen transmission and maintain the plant’s overall health.
Ideal Stem Selection
Identifying the ideal stem for propagating a Bloody Mary Philodendron involves selecting a healthy section with at least two to three nodes and several mature leaves. Choose a stem that exhibits robust growth, free from any signs of disease or pest infestation.
The presence of mature leaves indicates that the stem has reached an adequate level of photosynthetic capability, essential for sustaining new growth. Confirm the cutting is taken from a part of the plant that isn’t senescent or overly woody, as younger, semi-mature stems typically root more effectively.
Using sterilized pruning shears, cut the stem just below a node to maximize rooting potential. Proper stem selection enhances the likelihood of successful propagation and vigorous plant development.
Node Identification Tips
Ensuring a successful Bloody Mary Philodendron propagation involves accurately identifying nodes. Nodes are the crucial points on the stem where leaves, roots, and branches originate. Look for small, often slightly swollen segments on the stem; these nodes usually appear just below leaf petioles.
Select a cutting that includes at least one healthy node, ensuring it is neither damaged nor desiccated. The node must exhibit signs of importance, such as firmness and a slight green hue. Observing aerial roots at the node is beneficial, as these indicate readiness for new root development.
Avoid sections of the stem that are devoid of nodes, as they lack the essential structures for successful propagation. Accurate node identification is paramount for maximizing propagation success rates.
Preparing the Cutting
To prepare the cutting, select a healthy stem with at least two nodes and a few leaves. Using sterilized pruning shears, make a clean cut just below a node, ensuring the cut is at a 45-degree angle to maximize surface area for root development.
Remove any leaves from the lower node to prevent them from rotting once submerged. Inspect the cutting for any signs of disease or pests, such as discoloration or unusual markings. It is essential to use a cutting that is free from stress and in best health to enhance the chances of successful propagation.
Allow the cutting to dry for a few hours, which helps to prevent potential infections at the cut site.
Rooting in Water
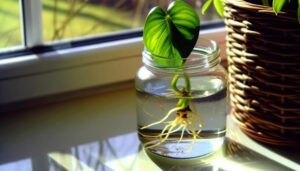
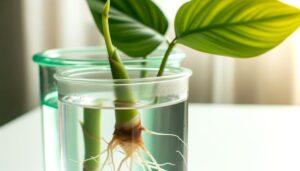
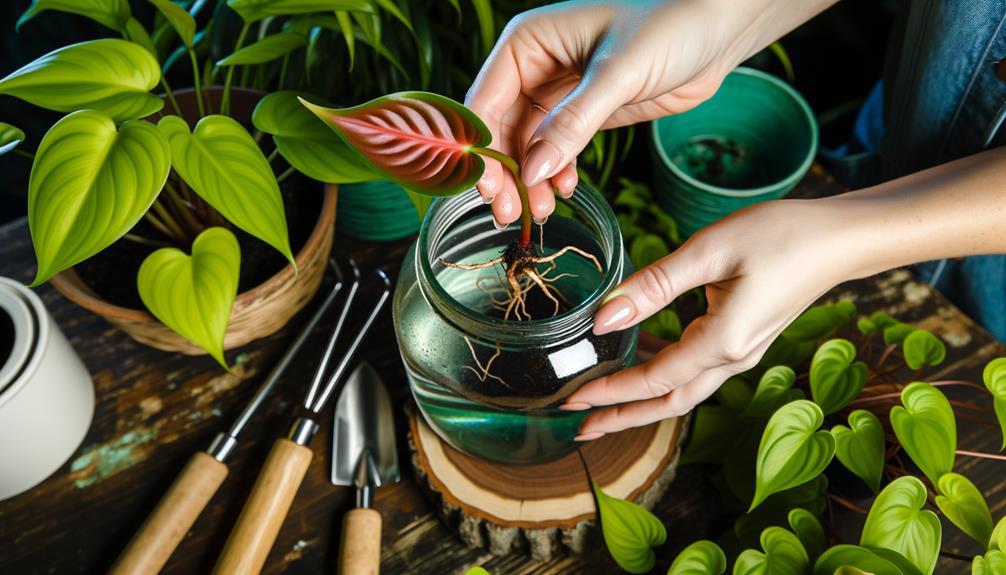
Submerge the prepared cutting in a container filled with clean, room-temperature water, making sure that the lower node is fully immersed while the leaves stay above the waterline to support photosynthesis.
Change the water every 3-5 days to prevent bacterial growth and support oxygenation. Place the container in indirect, bright light to encourage ideal root development. Monitor the cutting for root growth, which usually starts within 2-4 weeks.
| Observation Period | Expected Changes |
|---|---|
| Week 1 | Swelling at nodes |
| Week 2 | Initial root sprout |
| Week 3 | Root elongation |
| Week 4 | Multiple roots form |
| Week 5 | Ready for transplant |
Maintaining water cleanliness and suitable light conditions are crucial for successful root formation.
Rooting in Soil
For successful establishment in soil, make certain the cutting has at least one node and apply a rooting hormone to support faster root development.
Start by choosing a well-draining potting mix, ideally containing perlite and peat moss to maintain ideal aeration and moisture retention.
Insert the cutting into the soil, guaranteeing the node is buried approximately 1-2 inches deep. Maintain consistent soil moisture by misting lightly but avoid waterlogging, which can lead to root rot.
Position the container in a warm, humid environment with indirect light, as direct sunlight can dry out the cutting.
Monitor the cutting regularly for new growth, which typically indicates successful root establishment. This approach ensures strong root development, essential for the plant’s long-term well-being.
Transplanting to a Pot
When transplanting a Bloody Mary Philodendron, it is crucial to select a well-draining soil mix, typically comprising peat, perlite, and orchid bark.
Guarantee the pot size accommodates root growth without causing waterlogging, ideally with a diameter 1-2 inches larger than the root ball.
After transplanting, water the plant thoroughly to settle the soil and promote root establishment.
Choosing the Right Soil
Selecting the appropriate soil mix is crucial for the successful relocation of a Bloody Mary Philodendron, as it secures ideal drainage and aeration to support healthy root growth. The best soil composition should be well-draining and nutrient-rich.
A recommended soil mix includes:
- Sphagnum Moss: Improves moisture retention while maintaining adequate drainage.
- Pumice: Boosts aeration and prevents soil compaction, encouraging root oxygenation.
- Wood Chips: Enhances the soil’s structure, enhancing drainage and replicating the plant’s natural epiphytic habitat.
- Organic Matter: Supplies essential nutrients, promoting strong growth and enriching soil fertility.
Combine these elements in equal proportions to create an excellent growing medium. This mixture guarantees the roots receive ample air and moisture, reducing the chances of root rot and encouraging robust plant growth.
Proper Pot Size
After preparing the finest soil mix, selecting the fitting pot size is crucial to accommodate the growth needs of the Bloody Mary Philodendron.
A pot with a diameter of 6-8 inches is ideal for young plants, guaranteeing sufficient space for root expansion. Utilize a container with drainage holes to prevent waterlogging, as Philodendrons are prone to root rot.
When transplanting, make sure the pot depth allows the root ball to be fully covered while maintaining the soil level at the base of the stem.
Gradually increase pot size by 2 inches in diameter as the plant matures. Avoid excessively large pots, which can lead to overwatering and poor aeration. This strategic potting will promote robust growth and peak health.
Watering After Transplant
Establishing proper hydration post-transplant is crucial for the health of the Bloody Mary Philodendron.
After transplanting, follow these steps to ensure ideal moisture levels:
- Initial Watering: Thoroughly water the plant immediately after transplanting to settle the soil and eliminate air pockets around the roots.
- Drainage Check: Confirm the pot has sufficient drainage holes to prevent waterlogging, which can lead to root rot.
- Soil Moisture: Maintain consistently moist soil without letting it become soggy. Use a moisture meter for accurate readings.
- Watering Frequency: Adjust watering frequency based on environmental conditions. Typically, water when the top inch of soil feels dry to touch.
Proper watering techniques will support root development and reduce transplant shock, promoting strong growth.
Providing Proper Care
Maintaining ideal environmental conditions is essential for the healthy growth of a Bloody Mary Philodendron during its propagation phase. Securing proper light, humidity, temperature, soil, and fertilization is important. The plant thrives in indirect, bright light, and should be kept at a temperature between 65-80°F.
Humidity levels should be maintained around 60-70%. A well-draining potting mix, such as one containing perlite and peat moss, is recommended. Fertilize sparingly with a balanced, water-soluble fertilizer diluted to half strength every 4-6 weeks.
| Factor | Ideal Conditions |
|---|---|
| Light | Indirect, bright light |
| Temperature | 65-80°F |
| Humidity | 60-70% |
| Soil | Well-draining mix (perlite, peat moss) |
| Fertilization | Balanced, water-soluble, half strength |
These parameters secure optimal propagation and growth.
Troubleshooting Common Issues
Despite adhering to best care guidelines, cultivators may occasionally encounter issues during the propagation of a Bloody Mary Philodendron. Addressing these concerns promptly is essential for successful propagation.
Common issues include:
- Yellowing Leaves: Often a sign of overwatering or poor drainage. Verify the cutting medium is well-draining and reduce watering frequency.
- Root Rot: Detected by mushy, discolored roots. Remove affected roots and re-establish the cutting in a sterile, well-draining medium.
- Wilting: Typically caused by underwatering or low humidity. Increase water availability and maintain humidity around 60-70%.
- Pest Infestation: Aphids and spider mites can hinder growth. Use insecticidal soap or neem oil to treat affected areas.
Conclusion
The propagation of the Bloody Mary Philodendron is a meticulous process that involves selecting a healthy parent plant, using precise cutting techniques, and carefully rooting in either water or soil. This process highlights the intricacies of plant biology and the foundational principles that guide broader horticultural practices.
Coincidentally, the same principles that govern the propagation of this plant are essential to successful transplantation and ongoing care. This interconnectedness in botanical sciences underscores the significance of scientific accuracy and detailed methodology in achieving optimal plant growth and health.

